본문
Shared ViewModel
컴퓨터/이론: 안드로이드 2019. 9. 15. 11:45
도입
이번 포스팅에서는 fragment 사이에 ViewModel을 통해 데이터를 공유하는 방법에 대해 정리할 예정이다.
공식 문서에 있는 내용을 실습하고 확인할 예정이다. 아래 문서 참고
https://developer.android.com/topic/libraries/architecture/viewmodel#sharing
실습
Step1. 공통 ViewModel 생성
|
1
2
3
4
5
6
7
8
|
class CommonViewModel : ViewModel() {
val liveData = MutableLiveData<MutableList<String>>()
var position: Int = -1
init {
liveData.value = (0..50).map { "$it" }.toMutableList()
}
}
|
cs |
Step2. 2개 Fragment 생성
FirstFragment
|
1
2
3
4
5
6
7
8
9
10
11
12
13
14
15
16
17
|
class FirstFragment : Fragment() {
companion object {
fun newInstance() = FirstFragment()
}
private lateinit var viewModel: CommonViewModel
private lateinit var controller: FirstController
override fun onCreate(savedInstanceState: Bundle?) {
super.onCreate(savedInstanceState)
viewModel = activity?.run {
ViewModelProviders.of(this)[CommonViewModel::class.java]
} ?: throw Exception("Invalid Activity")
}
// ...
}
|
cs |
SecondFragment
|
1
2
3
4
5
6
7
8
9
10
11
12
13
14
15
16
17
|
class SecondFragment : Fragment() {
companion object {
fun newInstance() = SecondFragment()
}
private lateinit var viewModel: CommonViewModel
private lateinit var controller: SecondController
override fun onCreate(savedInstanceState: Bundle?) {
super.onCreate(savedInstanceState)
viewModel = activity?.run {
ViewModelProviders.of(this)[CommonViewModel::class.java]
} ?: throw Exception("Invalid Activity")
}
// ...
}
|
cs |
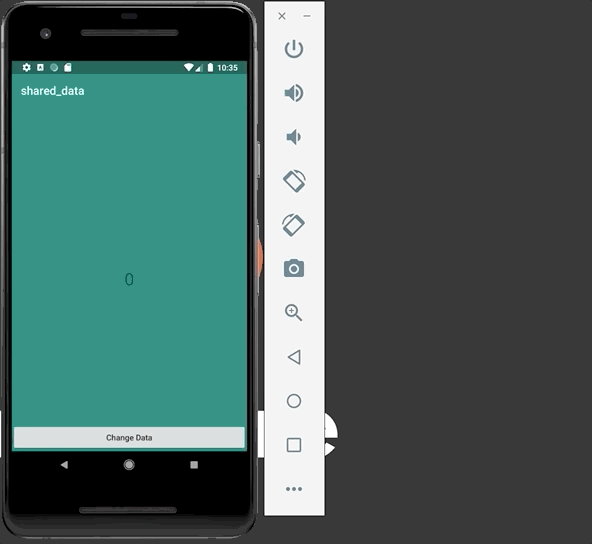
Step3. Fragment에서 사용되는 ViewModel의 주소값 확인


위 화면처럼 FirstFragment와 SecondFragment 모두 동일한 ViewModel을 사용하고 있는 것을 알 수 있다.
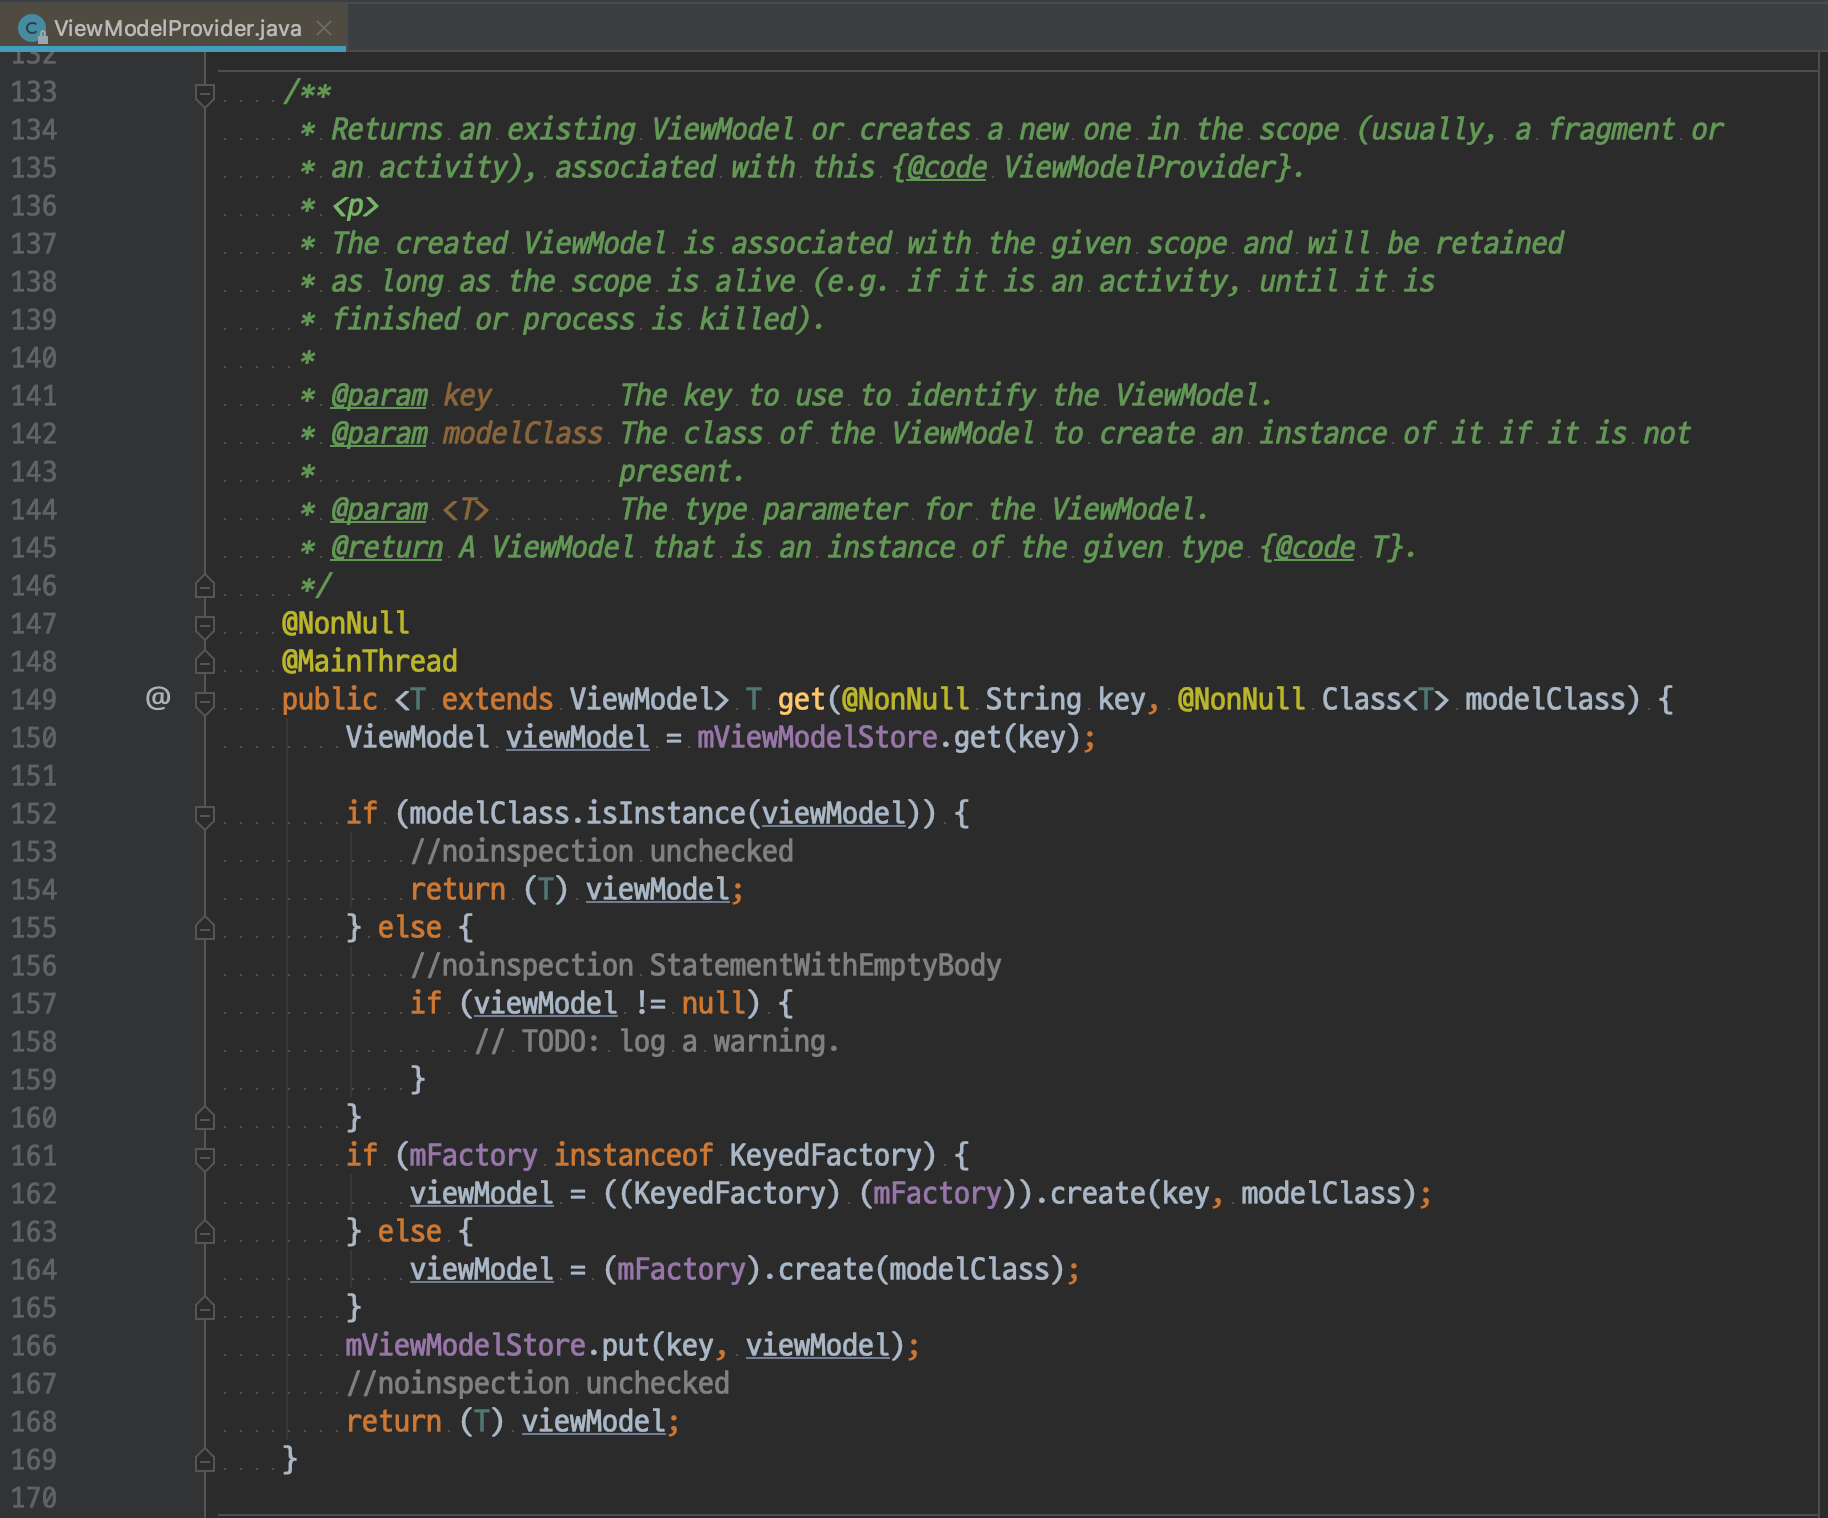
Step4. 내부 코드 확인
내부 코드를 확인해보면 ViewModel은 hashMap으로 관리되고 있고 ViewModel이 존재하면 해당 ViewModel을 반환한다.
스크린 샷
#shared viewModel #viewModel #viewModel 공유 #공유
'컴퓨터 > 이론: 안드로이드' 카테고리의 다른 글
| minSdkVersion, targetSdkVersion, compileSdkVersion 정리 (0) | 2020.03.14 |
|---|---|
| Current Thread 확인 (0) | 2020.03.12 |
| clipChildren 개념 및 실습 (0) | 2019.08.13 |
| ItemDecoration 개념 및 실습 (0) | 2019.05.31 |
| SVG, VectorDrawable 개념 및 실습 (0) | 2019.05.21 |
댓글